Install WordPress & Openlitespeed on Ubuntu 20.04 with Digital Ocean
Getting WordPress Setup & Optimised is effortless when you know-how. Learn How to Install WordPress using Openlitespeed & Digital Ocean on Ubuntu 20.04 Here
There are some huge advantages to managing your own WordPress website, and thanks to Digital Ocean, you can get easily install WordPress with almost no effort at all and optimise your WordPress website in just a few clicks thanks to Openlitespeed.
In fact, using this guide, you are going to learn how to install WordPress on Ubuntu 20.04 with Openlitespeed technology in just a few steps.
Who is Digital Ocean?
Digitalocean is a web hosting company that was founded in June 2011. Since their inception, they have grown from some basic, self-managed servers to fully scalable solutions that cover various applications such as web hosting, machine learning, database management, DNS management, load balancers and more.
Best of all, they have a huge range of one-click installers that will allow you to set up an optimised WordPress website easily with a few simple clicks and zero programming knowledge.
Digital Ocean are competitively priced compared to other managed hosting companies that normally take care of all the installation and maintenance required.
The reason Digital Ocean can competitively price their hosting is that you will need to configure everything yourself.
Digital Ocean gives you a blank server, and it’s down to you to get everything set up. But, fear not, Digital Ocean also have a free marketplace that includes a variety of different pre-configured images or one-click installers you can use for free that will allow you to install WordPress on Ubuntu.
With a few clicks, you will have an optimised WordPress website up and ready within the next 15 minutes.
Benefits of Using Digitalocean to Host WordPress
While the thought of setting up your own WordPress website server may seem a little daunting, it’s actually not that complicated once you know-how. The initial server setup can seem a little overwhelming, but as long as you follow along, you won’t need to do it again in the future (unless you plan to start a new blogging website).
- Full control over your server infrastructure
- Self configuration cuts down on hosting costs
- Load Balancing Available for High traffic websites
- Access to various marketplace installers
- Ultra fine-grain optimisation control not found with managed providers
- Easily Install Openlite Speed
Some people may suggest that you use Amazon Web Services (AWS) but, from my personal experience, are more suited to larger websites. I find the extra configuration required doesn’t really make it a beginner-friendly web hosting platform and will likely end with you getting frustrated and hiring a web developer to do it for you.
How to install WordPress on Ubuntu 20.04 on Digital Ocean
The following guide will use Openlitespeed to set up, configure and optimise your WordPress Website. Openlitespeed utilises NGINX to serve the static files along with Memcached and Redis for memory store. The following guide uses a Digital Ocean one-click installer, so it will be effortless to get started.
Overview of WordPress Installation Steps
- Sign up for a Digital Ocean account
- Setup a new droplet
- Select the correct image from the marketplace
- Select an appropriate Droplet Size
- Set Droplet Region
- Name your Droplet & Set Password
- *Optional* Enable backups
- Hit the Big Green Button
- Link your domain name to the new droplet
- Make sure the server is setup and responding
- Finalise Server Setup
- Install WordPress
- Test everything is working
I took the time to put together a quick tutorial video at the bottom of this post that shows you how to get started with the Digital Ocean dashboard and how to install WordPress on Ubuntu 20.04 using Digital Ocean step by step. I have not done any YouTube videos before so apologies for the low volume.
Step 1: Sign up for a Digital Ocean account

If you don’t have an account already, head over to the Digital Ocean website and sign up for an account.
You will need to enter your billing information and confirm your email address to continue.
If you follow our link, you will receive $100 free Digital Ocean credit valid for 60 days
Step 2: Setup a new droplet
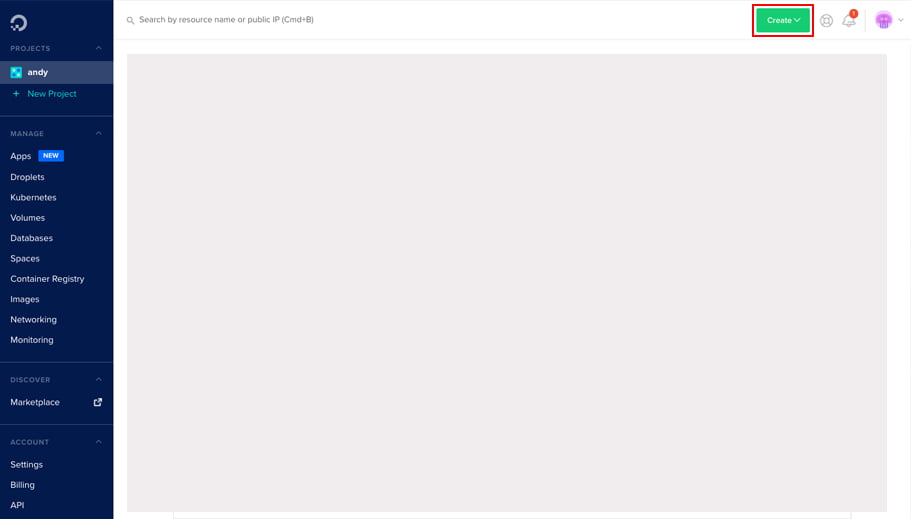
There is a green button called ‘Create’ on the top right-hand side from your Digital Ocean account dashboard.
Upon being clicked, it will reveal a drop-down menu. Please select ‘Droplets.’
Step 3: Select the correct image from the marketplace
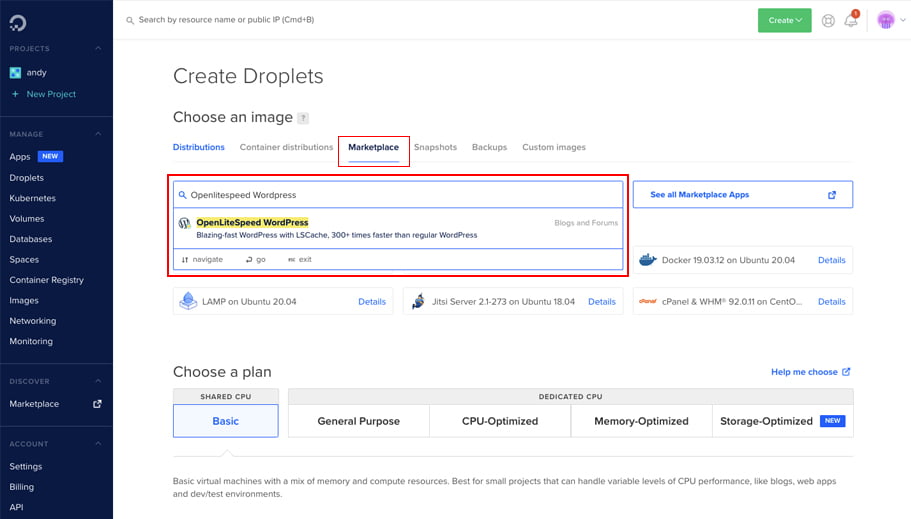
On the next screen, click the ‘Marketplace’ tab and search for OpenLiteSpeed WordPress in the keyword input field.
Step 4: Select an appropriate Droplet Size
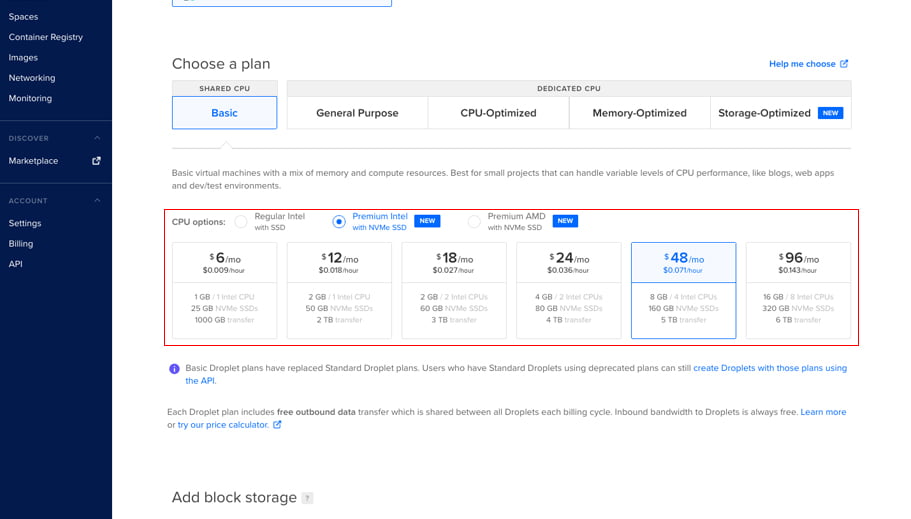
A droplet is an internet-connected storage space for your website files. For most websites, a Shared CPU instance is sufficient.
The server for this blog, Whisper Louder, costs me $18 a month and can handle thousands of concurrent connections.
I would personally recommend their $12 a month server at a minimum but expect to need to upgrade it once you start building a decent number of concurrent users.
Step 5: Set Droplet Region
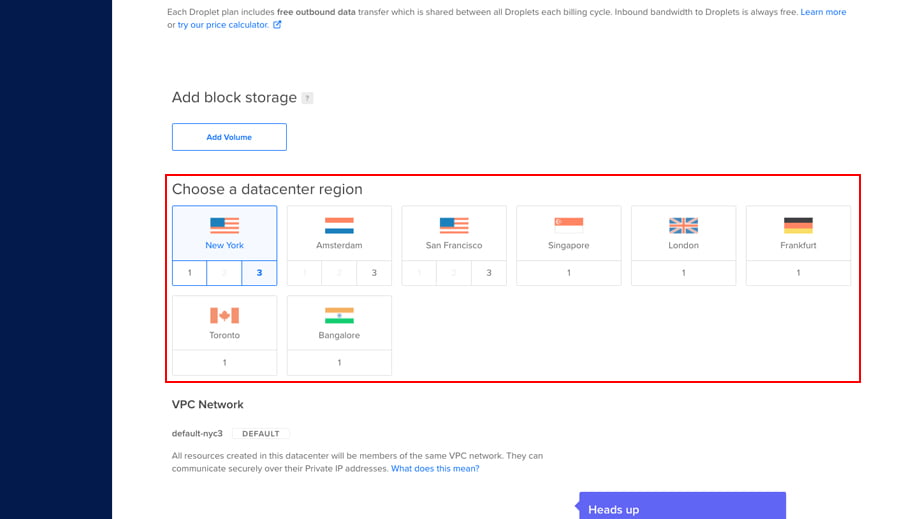
Digital Ocean offers Droplets worldwide with Datacenters all over the USA, UK, Europe and Asia.
Ensure you choose the closest location to your user demographics and target audience to keep website load times as low as possible.
If you are trying to build a global reach, you should consider using a CDN service to improve load times in various locations worldwide.
Cloudflare can optimise your website on the fly and distribute your files worldwide on its own services to provide a smoother loading experience for your readers.
They also offer an always-on service that will keep your website up even if there is a server outage.
Step 6: Name your Droplet & Set Password
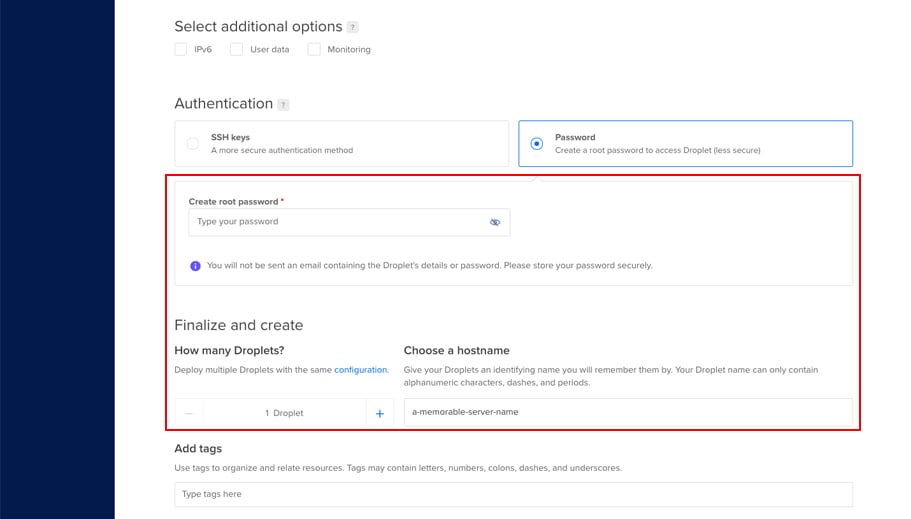
We are almost done setting up your blog on WordPress, but first, we need to give the server a name and set a secure password that can not be easily guessed.
Step 7: *Optional* Enable backups
While this step is optional, I don’t recommend skipping this step out. It does come with a monthly cost attached, but it is better to swallow the cost for your own peace of mind.
The small cost associated with having a backup just if something happens to your site, such as getting hacked, is invaluable.
Skip this option only if you will handle backups via another method.
Step 8: Hit the Big Green Button
Double-check over all of the options you have selected. If you are happy with everything, it’s time to hit the big green button and start creating your Droplet.
This process can take a while, so go and make yourself a brew. You deserve it.
Step 9: Link your domain name to the new droplet
To continue, we need to tell your domain about Digital Ocean. Login to your Domain names hosting provider and change your name servers.
Changing your domain’s name servers is unique to each provider. If you are struggling, you can also contact them, and they will normally happily help you out free of charge.
What are Digital Ocean’s Name Servers
Ns1.digitalocean.com
Ns2.digitalocean.com
Ns3.digitalocean.com
Once you have changed your domains name servers, head back to the Digital Ocean to complete this step.
Link your domain to Digital Ocean nameservers
- Go to the networking tab on the left-hand side of your dashboard
- At the top, enter your domain name you wish to add
- On the following page, enter two new A name records
- For the first, enter @ in the first box and for the second box, select your new droplet and hit save
- For the second, enter www in the first box and for the second, select your new droplet and hit save
Step 10: Make sure the server is setup and responding
Before you continue with this step, head over to your Dashboard and find the IP address associated with the Droplet you just created, copy it from the window and Pop it straight into the URL bar of your website browser.
You should be confronted with a page telling you to complete the setup.
Congratulations, you are on the right track – pat yourself on the back.
Step 11: Finalise Server Setup
We need to finalise the server’s initial setup, enable SSL, and tell our domain’s installation details.
- Open Command Prompt if you are on Windows or Terminal if you are on Mac
- Write ssh root@ in the window and hit enter
- Enter the password you setup in step 6.
- Enter your domain name and press enter
- Enter Y for yes when asked if you wish to issue a Lets Encrypt SSL certificate
- Enter your email address and press enter
- Select ‘yes’ when asked if you want to force HTTPS rewrite rule for this domain
If everything went smoothly, you should see a success message.
It is possible that Let’s Encrypt doesn’t find your domain name to start with. It can take some time for your domain name and its new settings to propagate over the internet.
Step 12: Install WordPress
- Give your WordPress blog a title
- Enter a username
- Enter a password
- Enter your email
- Install WordPress!
Step 13: Test everything is working
It may take a while for DNS settings to propagate. It can take up to 24 hours in extreme circumstances, but in most cases, it will propagate within a few minutes to an hour.
If you followed everything correctly, you should see the default WordPress installation ready to use.
If you head over to https://your-chosen-domain.com/wp-admin see the login page. In the URL bar, you should see a secured padlock indicating the site is SSL secured.
That’s it. All that is left to do is find a theme, get it Installed and start blogging.